Thursday, September 23, 2010

Happy Accidents

Don't you just love it when you have a Happy Accident?!
Today I created an image to display the Oyster Catcher silhouettes that I recently finished extracting from my photos taken on the local beach.
This was meant to just be a quick preview to see how they looked all together, and to show people for their ideas and opinions on whether I should go ahead and get them made into wall graphics. BUT you know how it is when you sit down with your craft, things decide their own direction, inspiration takes over and before you know it you have faffed around for ages and created something that you were not expecting. In this case a 'quick preview' which ended up being a little over dressed!
 I posted the preview on Facebook, where Melanie suggested that it become a print...luckily I had created it at a large file size through habit, and saved the layered psd file, so a quick change of the text, a bit of a tweek here and there, and voila!
I must admit, I feel a bit of a cheat to be honest, usually these things take hours, days, weeks often, to get from initial idea to finished artwork, and this was completed in about an hour!
I quite like it though, so I'm going to get a first print done tomorrow to see if any adjustments are needed.

What Happy Accidents have you had recently? I'd love to hear about them! 

Sunday, September 12, 2010

Freebie template - another view

I have been asked by a couple of people how exactly the free template I linked to in this post works, and also how to unzip it, and then rearrange the photo spaces, so I thought I'd do a little tutorial on it.
Here is the blank template : It is made as a 12x12 inch 200dpi file. 

When you first download the template, it is in a Zip file. Think of a Zip as a bag, if you are carrying some shopping home it is hard to keep it all together without a bag, this is the same with a Zip file, it holds the contents neatly together until you open it and take them out.
To 'unzip' it you may need a program, but if you use Windows XP, Vista or Windows 7 these come with their own inbuilt program to unzip files. I 'think' on a mac there is a program already installed, if not you can download one.
Browse to the zip location (if you are not sure where you saved it to or can't find it you can search for it, it is named "9phototemplate.zip")  Right click it, what happens next will vary depending on the program you are using, but it will say something like "extract all files" or you will see an option "extract to". Click that and a box will pop up for you to browse to the location you wish to save the template to. Again depending on the program you are using, you may need to make a folder yourself, or it may do it automatically when you unzip it. In some programs there is an option for you to choose whether it makes a new folder or not, but the default place for the files to be extracted to is the same location as the Zip File.  For this template don't worry too much about it as there are only 2 files, the template and the TOU/instructions so if it pops them down seperately you can always make a folder afterwards to keep them in together. Please keep the TOU with the template so that you can easily find it in a few months time when you can't remember where the template came from or what you can use it for! ;)
Hit OK or Next and the files will extract to your harddrive.  If you are using XP/ Vista/Windows 7 you can choose whether or not you want the extracted files to be automatically displayed when extracted. Otherwise browse to the folder to open them.
Open the template in your photo editing program and follow the instructions included with the template.

I have made it as one template rather than each photo space being a separate file to keep it as easy to use as possible, but you can chop it about and duplicate bits to make the combination of spaces that suits your project best.
For example, from this one template I have made several others to suit different projects, here is one of them:
For this I deleted the smaller square shapes, duplicated the rectangles and re-arranged to get a neater looking square grid.
One of the easiest ways to do this in Photoshop is to use the Rectangular Marquee tool, dragging it out around the area of the blank template that you want to duplicate, then hit CTRL + J this duplicates that area into its own layer. Continue doing this until you have the shapes you want, and move them into place. You can then use the same selection method to select the areas you don't want any more from the original template layer and delete them, or delete the whole layer if you have completely changed it and are not using any areas of it. As they are just shapes you can resize then any way you wish using Free Transform (Ctrl+T) in photoshop.
Here is another template I made by doing just that:
There are endless possibilities! Have fun changing it around to suit your project, and please consider sharing what you have made here, I'd love to see! :)

Credits for layout example "9 June 2009" are: Out Of the Toybox 2 Page Kit by Nicole Young and
DSP Audrey font from November 2008 Club Digital  both from Digital Scrapbook Place Store.  

Thursday, September 9, 2010

Pookickers

When we first moved to New Zealand and came across Pukekos for the first time I was struck by the beautiful tones of their feathers, and the way they somehow manage to be elegant and clumsy at the same time!
 

Pukekos are also known as Swamp Hens, they are members of the Rail family, which also includes the Weka, Crake and the endangered Takehe, (which looks quite like a big, fat, well fed, lazy Pukeko!)Their chicks are tiny, navy blue fluff balls, that hop along behind the parent Pukeko oblivious to quite how adorable they are.
 My kids were only very young when we saw our first Pukeko, and misheard the name, then proceeded to fall about it fits of giggles at such a silly bird as the "Poo-Kicker" You can imagine all the conversations that followed about why they have such big feet! Anyway, the name stuck and in our house at least these beautiful birds will forever be known as Pookickers.
When I started creating my range of wall graphics, I had to make a Pukeko, and here he is, in my hallway now ready to greet all our visitors!
 To get a better idea of the size, here he is next to my shoes, and yes I know they need a good clean!
And one last photo of him, or is he a her?! I'm really happy with how he has turned out, and also with the quality of the vinyl, it was really super easy to apply, and is so smooth and flat on the wall everyone can't help touching it and stroking it, and saying how they were so sure it was painted on the wall!
If you would like your very own Pukeko leave me a comment here or flick me an email, (fantaildigitalart at yahoo dot co dot nz) prices are in NZD. The special introductory price for this size (400mm tall) is just $30 but that is just for one more week! (That is practically cost price, so they are going to have to go up a little!) Have a look at my other shapes and word art in my album here Wall Graphics all orders placed before 18th September will be at these special reader/follower introductory prices! :)

Wednesday, September 8, 2010

Felt Faves!

This week for my picks from Felt I have chosen items from members in the Canterbury region, particularly Christchurch. Even if you are not in NZ you will have heard about the dreadful 7.1 earthquake which hit in the early hours of Sunday morning. After shocks continue, with the most recent having been just 1 hour ago as I type. I cannot imagine how scary it must be to be living there right now, never knowing when the next after shock is going to hit, or how bad it will be. If you are going to buy something special on Felt this week, please consider buying from one of the members living in the Christchurch area. We can do so little to help from so far away, but every sale helps even just a tiny bit.
Please remember that with the situation there at the moment, it may take a while for your order to be processed, let them know you are in no hurry, we don't want to cause extra stress just help out with a few purchases! :)
SO without further ado here are my picks for this week, there are so many talented people in Christchurch, I was blown away when I searched for them all! I couldn't choose something from each and everyone of them, but here is a selection to get you started -
original redflax headband – reversible, ooak, 100% upcycled funkyness! Dragonfly wrap dress by gowild, Victorian inspired Nikau necklacefrom blackswan, ' Hemi" original painting by Angelique Monaghan from wildones, Superstar Vintage Necklace by relique and last but most definitely not least, Scented mini teardrop candles – set of five from roseinthorns

Tuesday, September 7, 2010

Freebie Time! :)

** Mediafire who I usually use for hosting are down at the moment so I have changed the link to another filehost temporarily. When you click it, choose download as free user and then download. :)

Last year I took part in a project on Digital Scrapbook Place called "9 on the 9th" Every month for the entire year I took 9 photographs on, yes, you guessed it, the 9th of the month.
To keep some consistency throughout I designed a template which I used each month for my 9 photos.
Since then I have used this same template numerous times, it's amazing how many different looks you can get with the one template! Rotate it, flip it, chop it and end up with loads of totally different looks!
Here it is in use -
For the background and elements I usedWaterworld page kit, by Tina Chambers (Splash recoloured and some flowers recoloured and chopped about!)Available from the store at DSP

SO, you will be saying, yes, yes, all very nice, but where's the freebie?!

Here it is! 9 Photo Template  

I am giving you my trusted template, download it, unzip it, play with it. Do what ever you like with it, within reason!
Before you download here are a few common questions you may be wondering about;
YES you may use the template for your commercial projects.
YES you may use the template to display images on your blog or website.
YES  you may use the template to create storyboards/canvasses/collages for clients.
YES I will do it for you if you don't have the time/inclination/know how, for a small fee. :)
YES you may use the template to create a scrapbook page about the time Uncle Fred danced in his Y fronts with a traffic cone on his head...but please, you really do not need to share that one! No. Really ;)
BUT please credit Fantail Digital Art and add a link back to my blog when possible.
NO you may not download my template, re-package it, add your name and sell as your own. Because, well, that's just not nice.
Don't forget to let me know how you use this, I'd love to see!

Friday, September 3, 2010

The Results...

After my previous post, where I was practicing with using white vinegar to set ink jet prints, I thought Id give you an update.
After soaking in vinegar for 10 mins, I left the images to dry naturally. I then ironed them, with the iron set to high, but no steam. I pressed each image for a few minutes, moving the iron around so as not to burn the fabric. Once they were totally cool I hand washed them.

The ballerina I washed in hot water, with handsoap. There was no marked difference, no ink leakage and I was getting quite excited, until I got a bit rough with it and gave it a good scrub,
then I found a slight smudging around the image, and slight fading to the colour. (please excuse dreadful photo!)

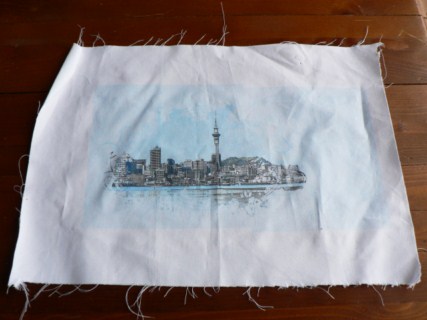
I took the fabric with the Tui and the cabbage tree on, and washed by hand in warm water, gently, no scrubbing just gently squeezing it in the soapy water.
There was very little damage done, very little if any fading, but perhaps very slight smudging around the edges, although this is not all over.

Next I took the seagul, again washed gently in warm water with soap.
The poor little guy did not come out too well! The image has faded to grey with a pink tinge to the edges, and all pale areas and detail have all but gone.
I compared these results to a sheep image, which has not been soaked in vinegar, but was ironed with a hot iron prior to washing in warm soapy water, and then accidentally got left on top of a damp facecloth for a couple of days. (don't ask, anything is possible in this house!)
As you can see, the ink has run, but mainly just the colours. The red has come out of the black, and the green of the leaves has seperated into blue and yellow and smudged around the image.

SO the conclusion to all this madness? Vinegar soak works to a certain extent. It is definitely worth doing more investigating into this method.
It works best on solid black images, probably as there is some loss of colour, but this isn't noticed as much on a solid black image. For items that are going to be constantly in the wash it probably is not going to work, but for things like labels in bags, or pictures that are not going to be washed often, and then can be washed with care it seems to be fine.
I am going to try this again, as there are several factors that may have affected my results.
1. I did not have a lot of vinegar left, so used the same bowl of vinegar for each image one after the other.
2. It was a dull day, and my hairdryer was broken, so I was unable to dry the fabric with heat immediately after soaking and rinsing, maybe this makes a difference? Next time I will tumble dry or iron them right after rinsing.
3. The sheep is not a good comparison to the other images, as it is highly likely that being left damp for a couple of days is what did most of the damage rather than the washing!

So there you have it. If you give this a go I'd love to hear any tips or success stories, in the mean time I will continue to test and search for a natural product that make the images totally colour fast.
I'd like to say a big thank you to Sarah from Dolls and Daydreams who got me started on this with her fabulous tutorial!

Thursday, September 2, 2010

The wonders of White Vinegar!

White Vinegar, such an unassuming, quiet little thing, yet with so many talents!
Use it for household cleaning,  window cleaning, deodorizing, toilet cleaner, as a rinse aid, to kill weeds, and slugs, discourage cats from using your flower bed as their private toilet, get rid of ants, as an antiseptic for grazes, removing rust, keeping flies away... and after that lot, have a well deserved sit down with a bowl of hot chips sprinkled with vinegar!
These are just some of the uses I know of and use, there will be many, many more, what do you use white vinegar for?
You will notice that my bottle is empty, I'm sure the supermarket must think I drink it, or own a chip shop, I seem to buy a bottle every time I go near the place!
The reason it is empty today is that I have been trying out an exciting new use for it, which I read on Dolls And Daydreams Blog after reading their post on Facebook. Setting ink after printing with an ink jet printer onto fabric!!
You may remember that I have been experimenting with this, using Jac paper when I had no freezer paper to attach the fabric to, and printing my desgins and the images I created for my wall graphics onto fabric to stitch onto the pile of bags I have sitting here patiently waiting to be used. All went well until it came to setting the ink...
...the chemical laden products that you can buy are not only expensive but hard to find, so I was really excited to see this post, claiming that good old White Vinegar does the trick!! Needless to say, I dashed off right away, grabbed my faithful bottle, a bowl and my images and set to it soaking them one by one.
They are now all hanging up to air dry.
No I'm not trying to prove how patient I am, believe me the idea of using the hairdryer as suggested by Sarah on the blog, is more than appealing, but sadly my hairdryer blew up, quite spectacularly actually, with an odd bang-pop-whoosh sound and a big flash,  a few days ago when my daughter turned it on, so that option is a no go. (Oh yes, she's fine, thanks for worrying, it shorted out, gave her a fright but no electrocution!)
So now I wait, hoping that the sun will come out and trying to resist the urge to take the fabric outside onto my deck and dance around waving it in the air. Once they are dry I'm going to set to it trying to get the ink out, wash it, scrub it, put it through all the rigorous tests I can think of, and see what happens!
I have some cards to collect from the printers so I might go and do that to take my mind off the waiting. Funnily enough the printers is right next door to the chip shop and all this playing with vinegar has left me hungry...!