
Here is the blank template : It is made as a 12x12 inch 200dpi file.

When you first download the template, it is in a Zip file. Think of a Zip as a bag, if you are carrying some shopping home it is hard to keep it all together without a bag, this is the same with a Zip file, it holds the contents neatly together until you open it and take them out.
To 'unzip' it you may need a program, but if you use Windows XP, Vista or Windows 7 these come with their own inbuilt program to unzip files. I 'think' on a mac there is a program already installed, if not you can download one.
Browse to the zip location (if you are not sure where you saved it to or can't find it you can search for it, it is named "9phototemplate.zip") Right click it, what happens next will vary depending on the program you are using, but it will say something like "extract all files" or you will see an option "extract to". Click that and a box will pop up for you to browse to the location you wish to save the template to. Again depending on the program you are using, you may need to make a folder yourself, or it may do it automatically when you unzip it. In some programs there is an option for you to choose whether it makes a new folder or not, but the default place for the files to be extracted to is the same location as the Zip File. For this template don't worry too much about it as there are only 2 files, the template and the TOU/instructions so if it pops them down seperately you can always make a folder afterwards to keep them in together. Please keep the TOU with the template so that you can easily find it in a few months time when you can't remember where the template came from or what you can use it for! ;)
Hit OK or Next and the files will extract to your harddrive. If you are using XP/ Vista/Windows 7 you can choose whether or not you want the extracted files to be automatically displayed when extracted. Otherwise browse to the folder to open them.
Open the template in your photo editing program and follow the instructions included with the template.
I have made it as one template rather than each photo space being a separate file to keep it as easy to use as possible, but you can chop it about and duplicate bits to make the combination of spaces that suits your project best.
For example, from this one template I have made several others to suit different projects, here is one of them:

One of the easiest ways to do this in Photoshop is to use the Rectangular Marquee tool, dragging it out around the area of the blank template that you want to duplicate, then hit CTRL + J this duplicates that area into its own layer. Continue doing this until you have the shapes you want, and move them into place. You can then use the same selection method to select the areas you don't want any more from the original template layer and delete them, or delete the whole layer if you have completely changed it and are not using any areas of it. As they are just shapes you can resize then any way you wish using Free Transform (Ctrl+T) in photoshop.
Here is another template I made by doing just that: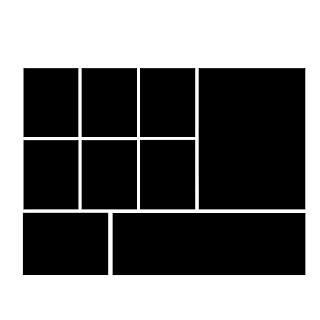

There are endless possibilities! Have fun changing it around to suit your project, and please consider sharing what you have made here, I'd love to see! :)
Credits for layout example "9 June 2009" are: Out Of the Toybox 2 Page Kit by Nicole Young and
DSP Audrey font from November 2008 Club Digital both from Digital Scrapbook Place Store. 


No comments:
Post a Comment